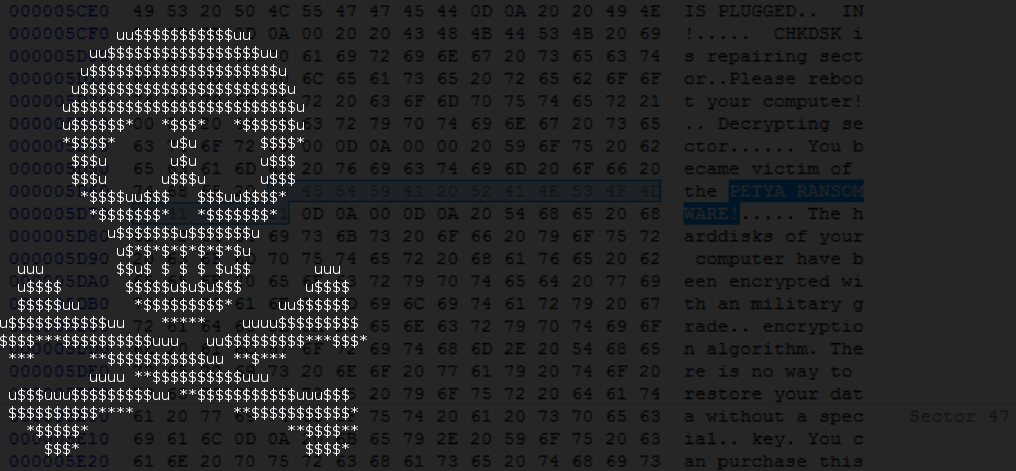
After being defeated in April, Petya comes back with new tricks. Now, not as a single ransomware, but in a bundle with another malicious payload – Mischa. Both are named after the satellites from the GoldenEye movie.
They deploy attacks on different layers of the system and are used as alternatives. That’s why, we decided to dedicate more than one post to this phenomenon. Welcome to part two! The main focus of this analysis is Mischa and Setup.dll (the malicious installer that chooses which payload to deploy).
The first part (about Green Petya) you can read about it here.
UPDATE: Improved version of Green Petya is out. More details given in the new article.
Analyzed samples
- 8a241cfcc23dc740e1fadc7f2df3965e – main executable
- c8e4829dcba8b288bd0ed75717214db6 – Setup.dll
- 10b2d20a3c36fe6a5bf6f3b15149c3d1– Mischa.dll (raw dump from the memory)
- 34da44570eb8c7a5038370f553eb3899 – Mischa.dll (with filled section xxxx)
- c8e4829dcba8b288bd0ed75717214db6 – Setup.dll
Execution flow
- The main executable – a dropper protected by a crypter/FUD:
- unpack and deploy: Setup.dll
- install: Petya
- alternatively – deploy: Mischa.dll
- unpack and deploy: Setup.dll
Behavioral analysis
As mentioned in the previous part of the article, both malicious payloads are dropped by the same dropper. The choice of which one will be used for the attack is made based on the privileges with which the sample is deployed. First, there is a request asking a user to elevate the application’s privileges:
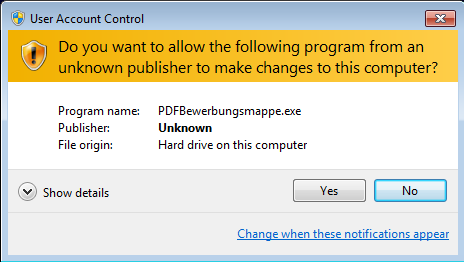
In case the user answered “Yes” to the question – his/her machine was getting infected by the Petya ransomware (described in details here).
But even in case the user was more cautious and didn’t allow to deploy payload with administrator privileges, it didn’t help much. Authors of the malware still found a way to attack the system. Just by launching another payload – Mischa, that does not require elevated privileges in order to work.
This payload works just like any other ransomware – encrypting files one by one and dropping a ransom note: YOUR_FILES_ARE_ENCRYPTED.HTML (identical name was used before by another ransomware: Chimera). The layout is analogical to the one used by Petya.
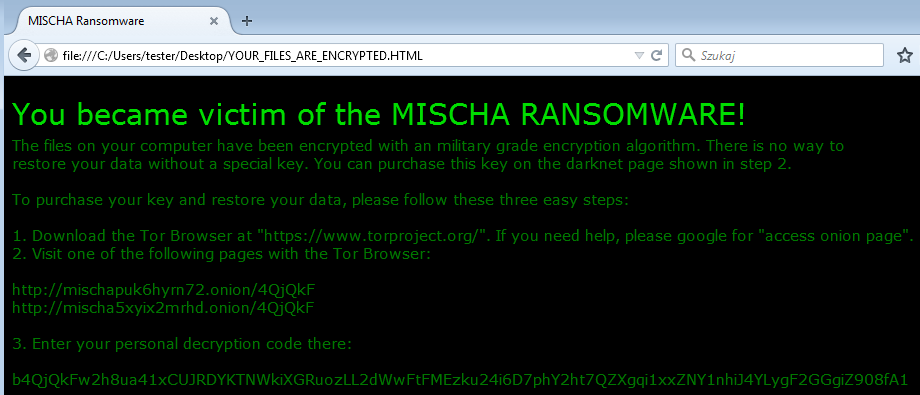
The same text we can find in a dropped TXT file.
Encryption process
Mischa does not need to download a key from the CnC server – data can be encrypted offline as well. Extensions given to the encrypted files are random, generated at runtime (they are same like a part of the tor address):

The atypical feature of Mischa is that it encrypts not only documents, but executables also (only few ransomware has been observed to do it).
Entropy of encrypted samples is high and no patterns are visible. See below a visualization of bytes.
square.bmp : left – original, right encrypted with Mischa

The same input does not produce the same output – that suggest that every file is encrypted with an individual key (or initialization vector).
At the end of every encrypted file, the unique ID is appended (like the one displayed in the ransom note):

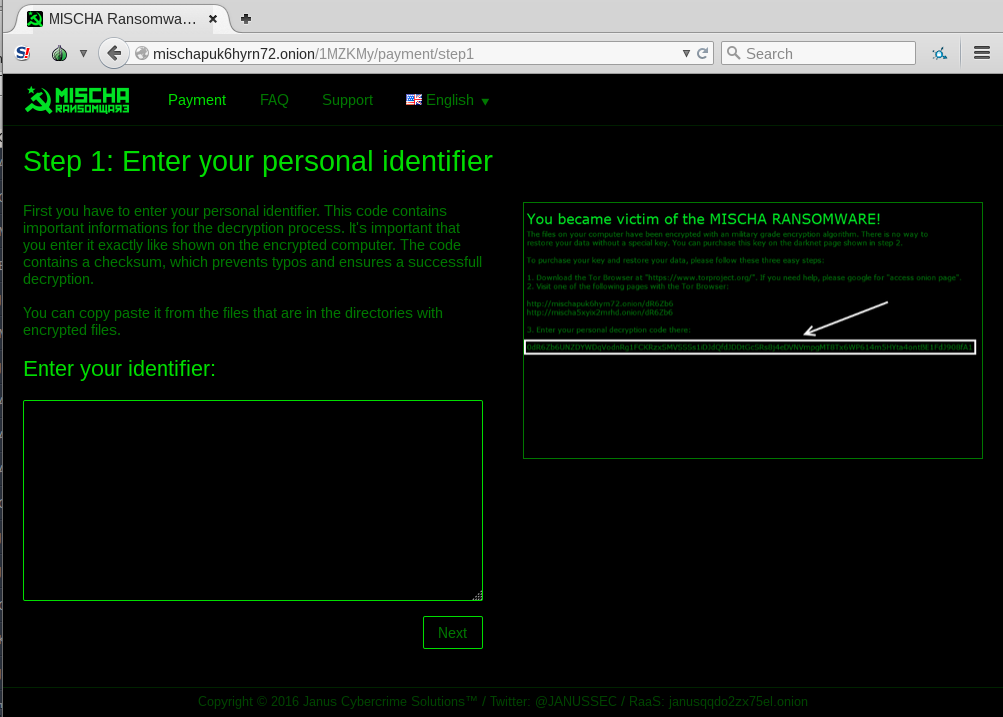
Page for the victim:
Inside
The main executable (with an icon pretending a PDF document) is packed in an underground cryptor and its only role is to deliver and deploy the malicious core – Setup.dll. This exe’s code doesn’t make much sense for the functionality of the malware – it is only a deception layer added to create a noise and cover a real mission of the sample. Description of the packing will be omitted this time (it’s very similar to the packing of the previous Petya).
Setup.dll
Setup.dll carry inside Petya and Mischa and decides which one of them will be dropped. This is the part of the malware is responsible for triggering the UAC popup.
Similarly to the dropper of the previous Petya, it comes with a section .xxxx:
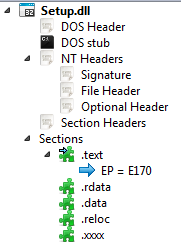
This section is very important, because it contains both payloads – Petya and Mischa (encrypted by simple XOR based algorithm). At the beginning of the execution they are being decrypted:
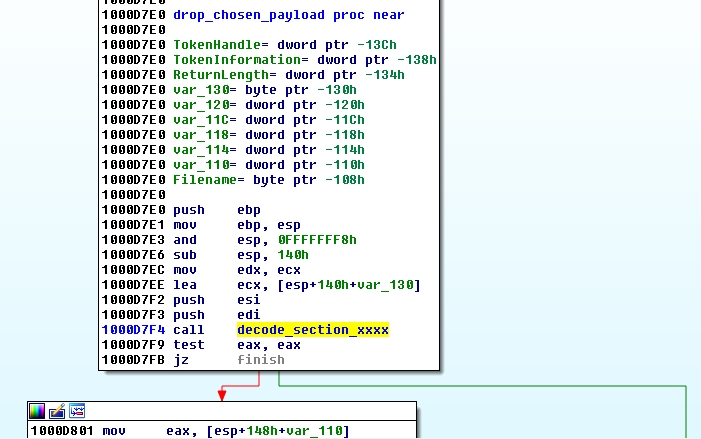
We can see a stub similar to the previous Petya:
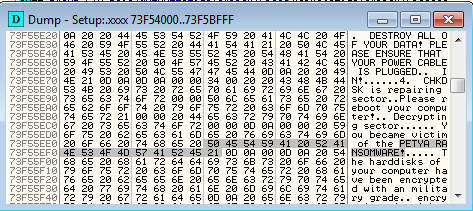
In the same section a new PE file is revealed, that turns out to be a DLL of Mischa.
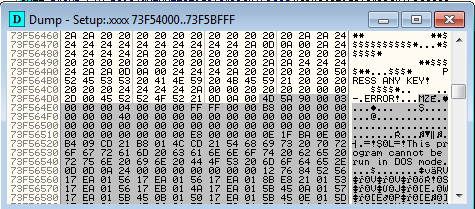
Authors tried to deceive tools for automated dumping of PE files from the memory, and provided fake “MZ”…”PE” patterns:

After decrypting the payloads, an environment check is performed in order to choose which one of them will be installed. The process token (resembling the privileges with which the sample was run) is used for choosing which installation path to follow next.
Reading the token of current process:
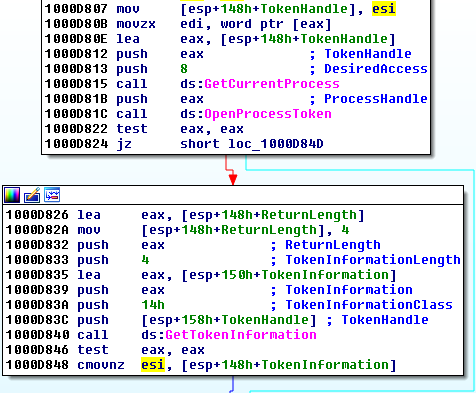
Choosing between Petya and Mischa is done in few steps. First, the token check is used to get information if the application is deployed with administrative rights. If it is not, then the it tries to run it’s new copy with higher privileges (using runas command). If this attempt failed, Mischa is dropped (otherwise – Petya).
Dropper comes with a list of Anti-Malware products, which presence is checked before the payload is deployed:
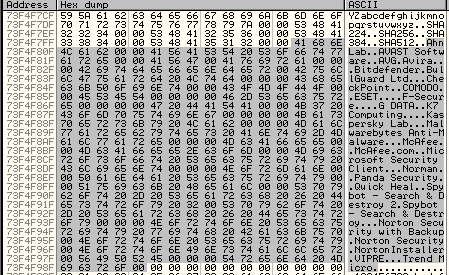
Among strings we can see URLs for Petya as well as for Mischa. The below part of code is responsible for generating individual URLs for the particular victim and writing them into the payload:

Inside the dropper, Mischa’s DLL (similarly to Petya’s stub) is being filled with additional, unique data. Similarly to Petya, Mischa gets a random key that will be used in further encryption process. This key is encrypted using ECC and transformed into a victim ID. Then, part of this victim ID becomes a part of the individual web address.
This unique data is generated by the dropper and (encrypted by a simple XOR based algorithm) stored in a new section – .xxxx – dynamically appended to the payload in the preparation phase. (If we dump Mischa too early, without this section, we will get incomplete data and the DLL will not run properly). See below – example of Mischa.dll with the added section:
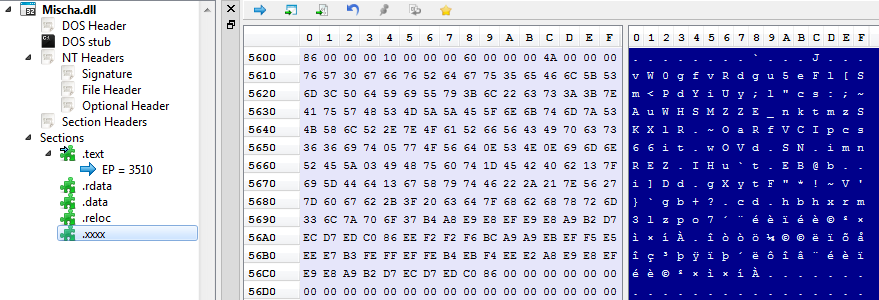
At this stage, the victim ID that later is being displayed in the ransom note, as well as the onion addresses are ready.
After such preparation, Mischa.dlll is injected to conhost.exe and deployed as a remote thread. Below, we can see the buffer containing the prepared Mischa.dll being written to the memory allocated in the remote process:
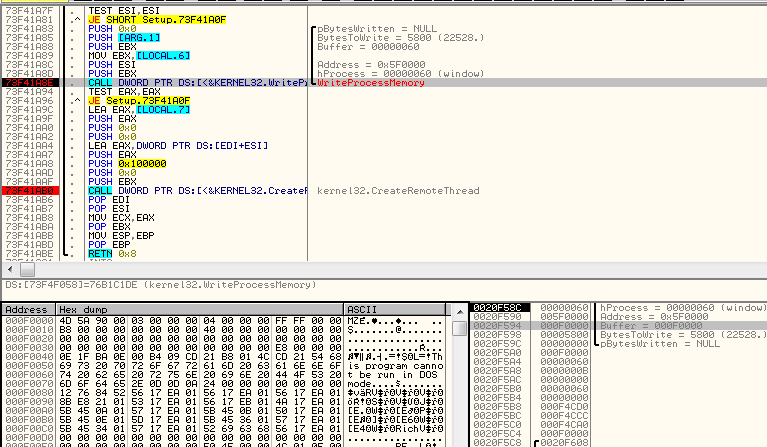
Execution (including encryption) continues in the remote thread.
Mischa.dll
Again we can see a DLL using ReflectiveLoader* – just like in the case of Chimera and Rokku (along with other similarities in the code, it may confirm the theory, that authors behind those projects are the same):
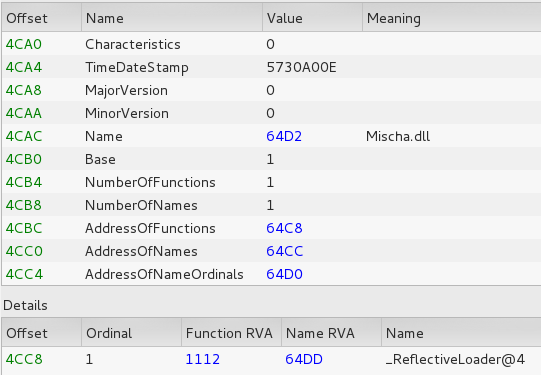
*ReflectiveLoader is a special stub belonging to the technique of Reflective DLL Injection. This technique allows to produce a DLL that can be easily injected into another process. Similarly to a shellcode, such DLL is self-contained and automatically loads all it’s dependencies.
What is attacked?
Mischa fetches the list of mapped drives (GetLogicalDriveStringsA) and identifies the drive type by a Windows API function: GetDriveType. It attacks removable, fixed and remote drives.
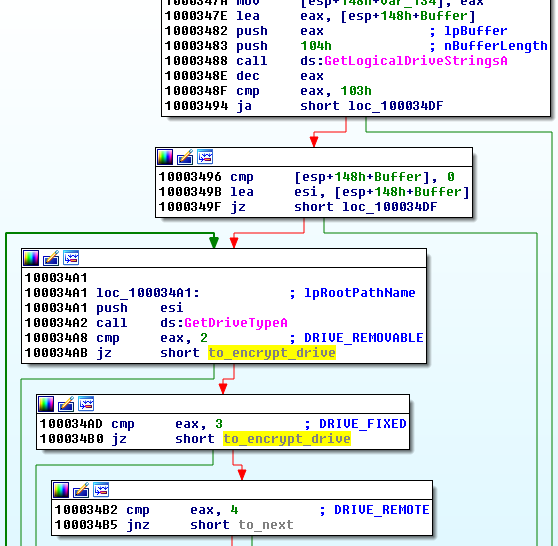
Blacklisted paths:
Windows $Recycle.Bin Microsoft Mozilla Firefox Opera Internet Explorer Temp Local LocalLow Chrome
Attacked extensions:
txt doc docx docm odt ods odp odf odc odm odb rtf xlsm xlsb xlk xls xlsx pps ppt pptm pptx pub epub pdf jpg jpeg frm wdb ldf myi vmx xml xsl wps cmf vbs accdb ini cdr svg conf cfg config wb2 msg azw azw1 azw3 azw4 lit apnx mobi p12 p7b p7c pfx pem cer key der mdb htm html class java asp aspx cgi cpp php jsp bak dat pst eml xps sqllite sql jar wpd crt csv prf cnf indd number pages lnk dcu pas dfm directory pbk yml dtd rll lib cert cat inf mui props idl result localstorage ost default json sqlite log bat ico dll exe x3f srw pef raf orf nrw nef mrw mef kdc dcr crw eip fff iiq k25 crwl bay sr2 ari srf arw cr2 raw rwl rw2 r3d 3fr eps pdd dng dxf dwg psd png jpe bmp gif tiff gfx jge tga jfif emf 3dm 3ds max obj a2c dds pspimage yuv 3g2 3gp asf asx mpg mpeg avi mov flv wma wmv ogg swf ptx ape aif wav ram m3u movie mp1 mp2 mp3 mp4 mp4v mpa mpe mpv2 rpf vlc m4a aac aa3 amr mkv dvd mts vob 3ga m4v srt aepx camproj dash zip rar gzip vmdk mdf iso bin cue dbf erf dmg toast vcd ccd disc nrg nri cdi
How does the encryption work?
Every file is encrypted with a random key. First, using WindowsCryptoAPI function CryptGenRandom 128 random bits are fetched. Then, they are hashed and used to generate the initialization vector.

Apart from the above few calls, Windows Crypto API is not used for the cryptography. Instead, all is implemented locally (just like in case of Chimera and Rokku). Below – fragment of the local implementation of function SHA-256, containing typical constants:
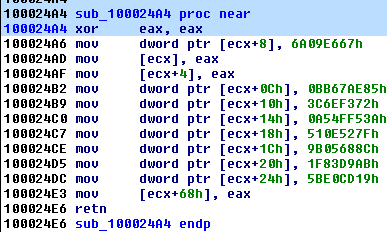
File content is read in portions – 1024 bytes at once:
and then, encrypted by the locally implemented algorithm:
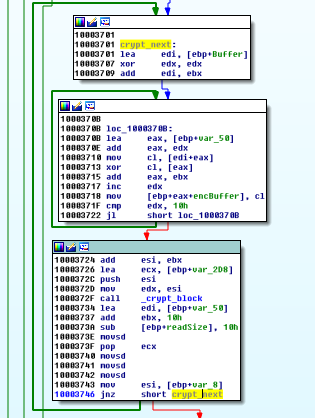
Encryption process is divided in 2 phases.
Phase 1:
Each 16 bytes of the read chunk is preprocessed by XOR with a 16 byte long buffer:

At first, as the XOR key a random buffer is used. For next portions of data, the output of the second phase becomes the XOR key (it is a characteristics of Cipher Block Chaining – CBC)
Phase 2:
The output of phase 1 is passed to another encrypting function:
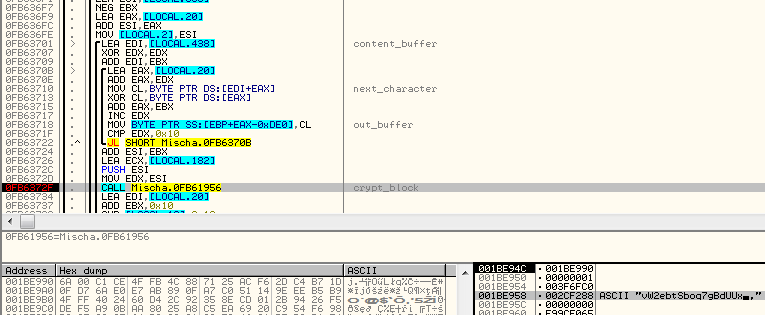
This block cipher processes 16 bytes of the input and gives as a result 16 bytes of encrypted output. Encryption involves a 16 byte long key (that was hardcoded in the appended section) – in a given example it is vW2ebtSboq7gBdUU.
Notice the same key saved inside the .xxxx section (client ID – stored just after that – represents the encrypted form of this key, that only the attackers can decode):

As long as Mischa is running, this key is in memory in open text. But once it finishes, this data is being destroyed and only the encrypted form of the key is left – user receives it in the ransom note. (It is somehow similar to the logic of Petya).
Encrypted chunks are being written into the file one by one:
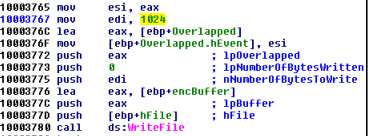
After the full file is encrypted and the content stored, additional data is appended at the end.
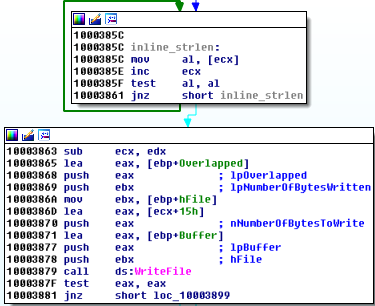
Then, file is moved under the new name.

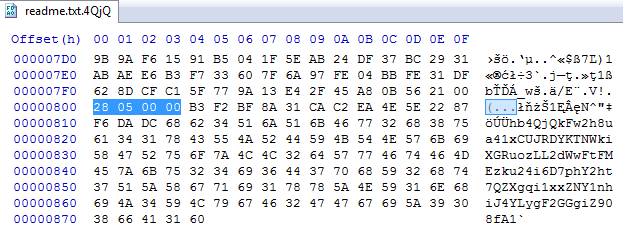
Let’s have a look at the appended data and it’s role in decoding the file. At the end of the encrypted file we can find:
- Length of the original file (0x528 -> 1320)
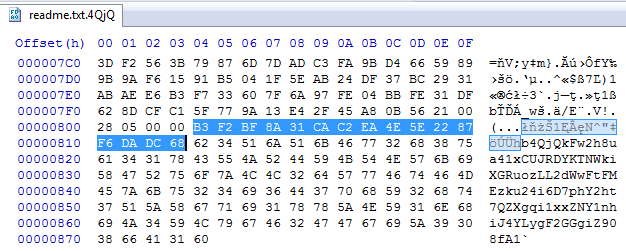
2. Initialization vector – the random buffer of 16 bytes, that was used to initialize the XOR cycle:
3. Client ID (as mentioned before) – that is encrypted key which was used for the second encryption operation. In the above example, this key was: vW2ebtSboq7gBdUU
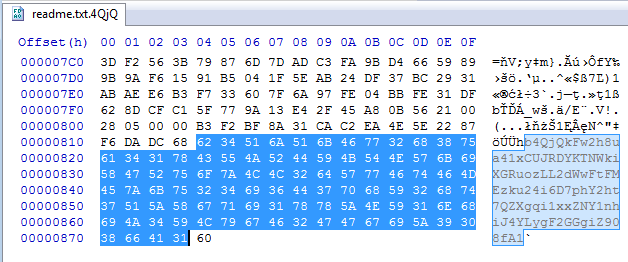
Having the important pieces of data – initial XOR buffer and the decrypted key – full process of encryption can be reversed by the attackers.
Conclusion
Mischa, in contrast to Petya, is yet another typical ransomware. It is well packed and written cleanly, but the core looks simple. We didn’t find any novel or unexpected features inside. It seems like the main focus of the authors was Petya, and Mischa was added just as a failsafe. However, even if it is simple, it plays the planned role pretty well. When the user rejected the request of elevating application privileges, he/she will probably not expect the application to be running at all. But this is the event that makes Mischa deploy it’s sneaky attack. In fact it may have more painful consequences than the attack of Petya. In case of Petya, some part of the disk content can be recovered using forensics tools – but with Mischa it is not possible.
Appendix
http://www.bleepingcomputer.com/news/security/petya-is-back-and-with-a-friend-named-mischa-ransomware/ – Bleeping Computer about Mischa
/blog/threat-analysis/2016/04/petya-ransomware/ – about the previous version of Petya
Petya and Mischa – Ransomware Duet (Part 1):
/blog/threat-analysis/2016/05/petya-and-mischa-ransomware-duet-p1/
