In part two of our blog assessing the security of a portable router, we will acquire the tools and equipment to make a copy of the firmware on our target router so that we can assess the full firmware.
Sometimes, the manufacturer has an updated firmware that is available on their website. It could be just that—an update—and therefore incomplete. We want to be able to compare the updated and existing firmware to see what was changed.
With a complete firmware, we can browse the file system of the router and look for interesting security developments. Is there an administrative backdoor? Is there functionality that might be undocumented or concerning?
Ultimately, we want to better understand how this device works, and without the complete picture, that isn’t possible (or it’s significantly harder).
More shopping
The third arm solution I had purchased in our first blog was under performing. It didn’t have enough arms, was a little on the flimsy side, and tended to tip over easily. I purchased a more robust solution. This will be used to hold the router, lights, USB microscope, and other devices when we acquire the firmware.

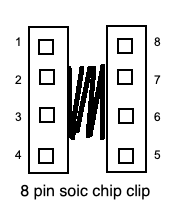
We will also need a SOIC 8 PIN clip.
This will be used to connect to the eeprom without de-soldering the actual chip. (Desoldering tends to result in the chip not working ever again, at least for me.) I bought several SOIC clips, mainly because my original was taking forever to get here, and also because I read online comments on how effectiveness varied wildly between the “cheap” SOIC clips and the more expensive ones. The cheap ones have a tendency to pop off if the cabling is disturbed.
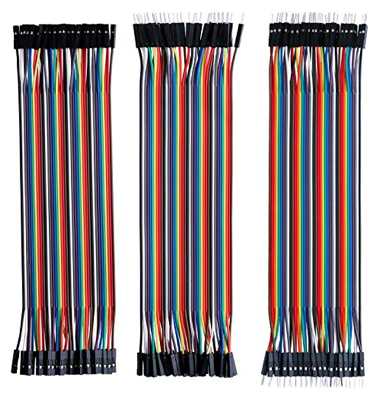
I also bought some jump wires for plumbing the clip to any diagnostic device I choose to use.
In addition, I bought a small USB microscope. Nothing fancy: 200X magnification. The writing on the chips was so small that I was struggling to read it. SuperEyes touts its use for dental purposes. It works fine for reading the small markings on various chips, too.

Acquisition hardware
There are several options to achieve this. The most common one is the Bus Pirate from Dangerous Prototypes.
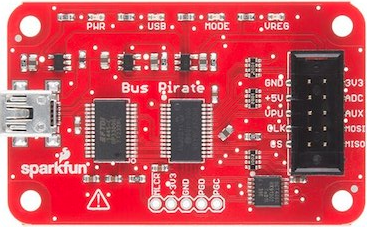
After some online research, I found that there are several versions of the Bus Pirate available. I elected version 3 (v3.6 to be precise) after seeing this comment on the Dangerous Prototype page: Bus Pirate v3 is still the best choice if you want something you can use without a lot of hassle. The v4 firmware is rough around the edges, but it is improving all the time.
I bought three Bus Pirates in total: two v3.6’s and a v4.0. The plan is to have a stock v3.6, with whatever loader and firmware it comes with, and have a spare to update it to the community loader and community firmware that can be found here.
The 4.0 Bus Pirate is for the remote possibility that neither 3.6’s or other solutions work successfully. (The Bus Pirate v4 is still making its way though our postal system.)
The Bus Pirate has the highest number of blog posts and YouTube videos demonstrating its use, but during my research, I came across some information that gave me some pause.
The development by Dangerous Prototypes of the Bus Pirate seems to have stopped. It could be that it has all the needed features, but when I used the Bus Pirate in conjunction with flashrom, the software I used on my Linux development machine, it complained about the firmware revisions that came with my v3.6 models.
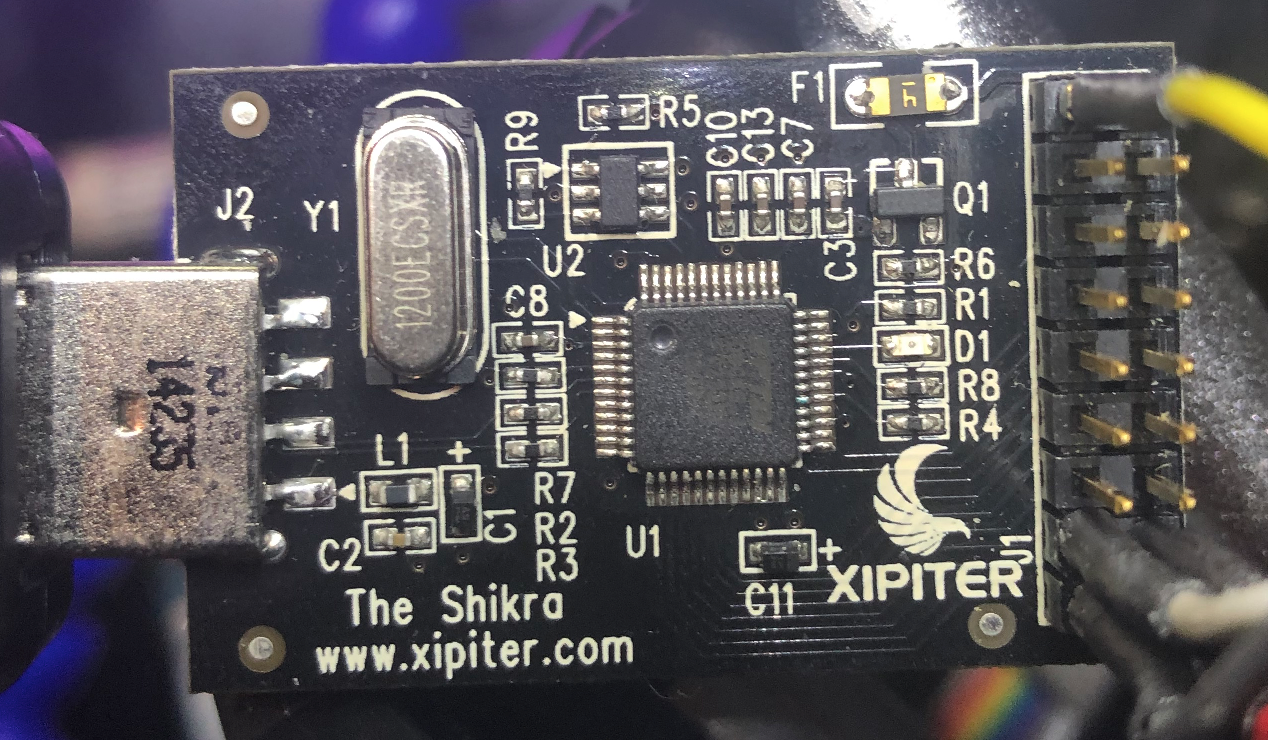
Further research also turned up the Shikra, made by Xipiter. I also acquired one of these, with the intention to use it to dump the router firmware with it and compare it to the one acquired with the Bus Pirate. It never hurts to have multiple ways of achieving the same results.
Let’s begin!
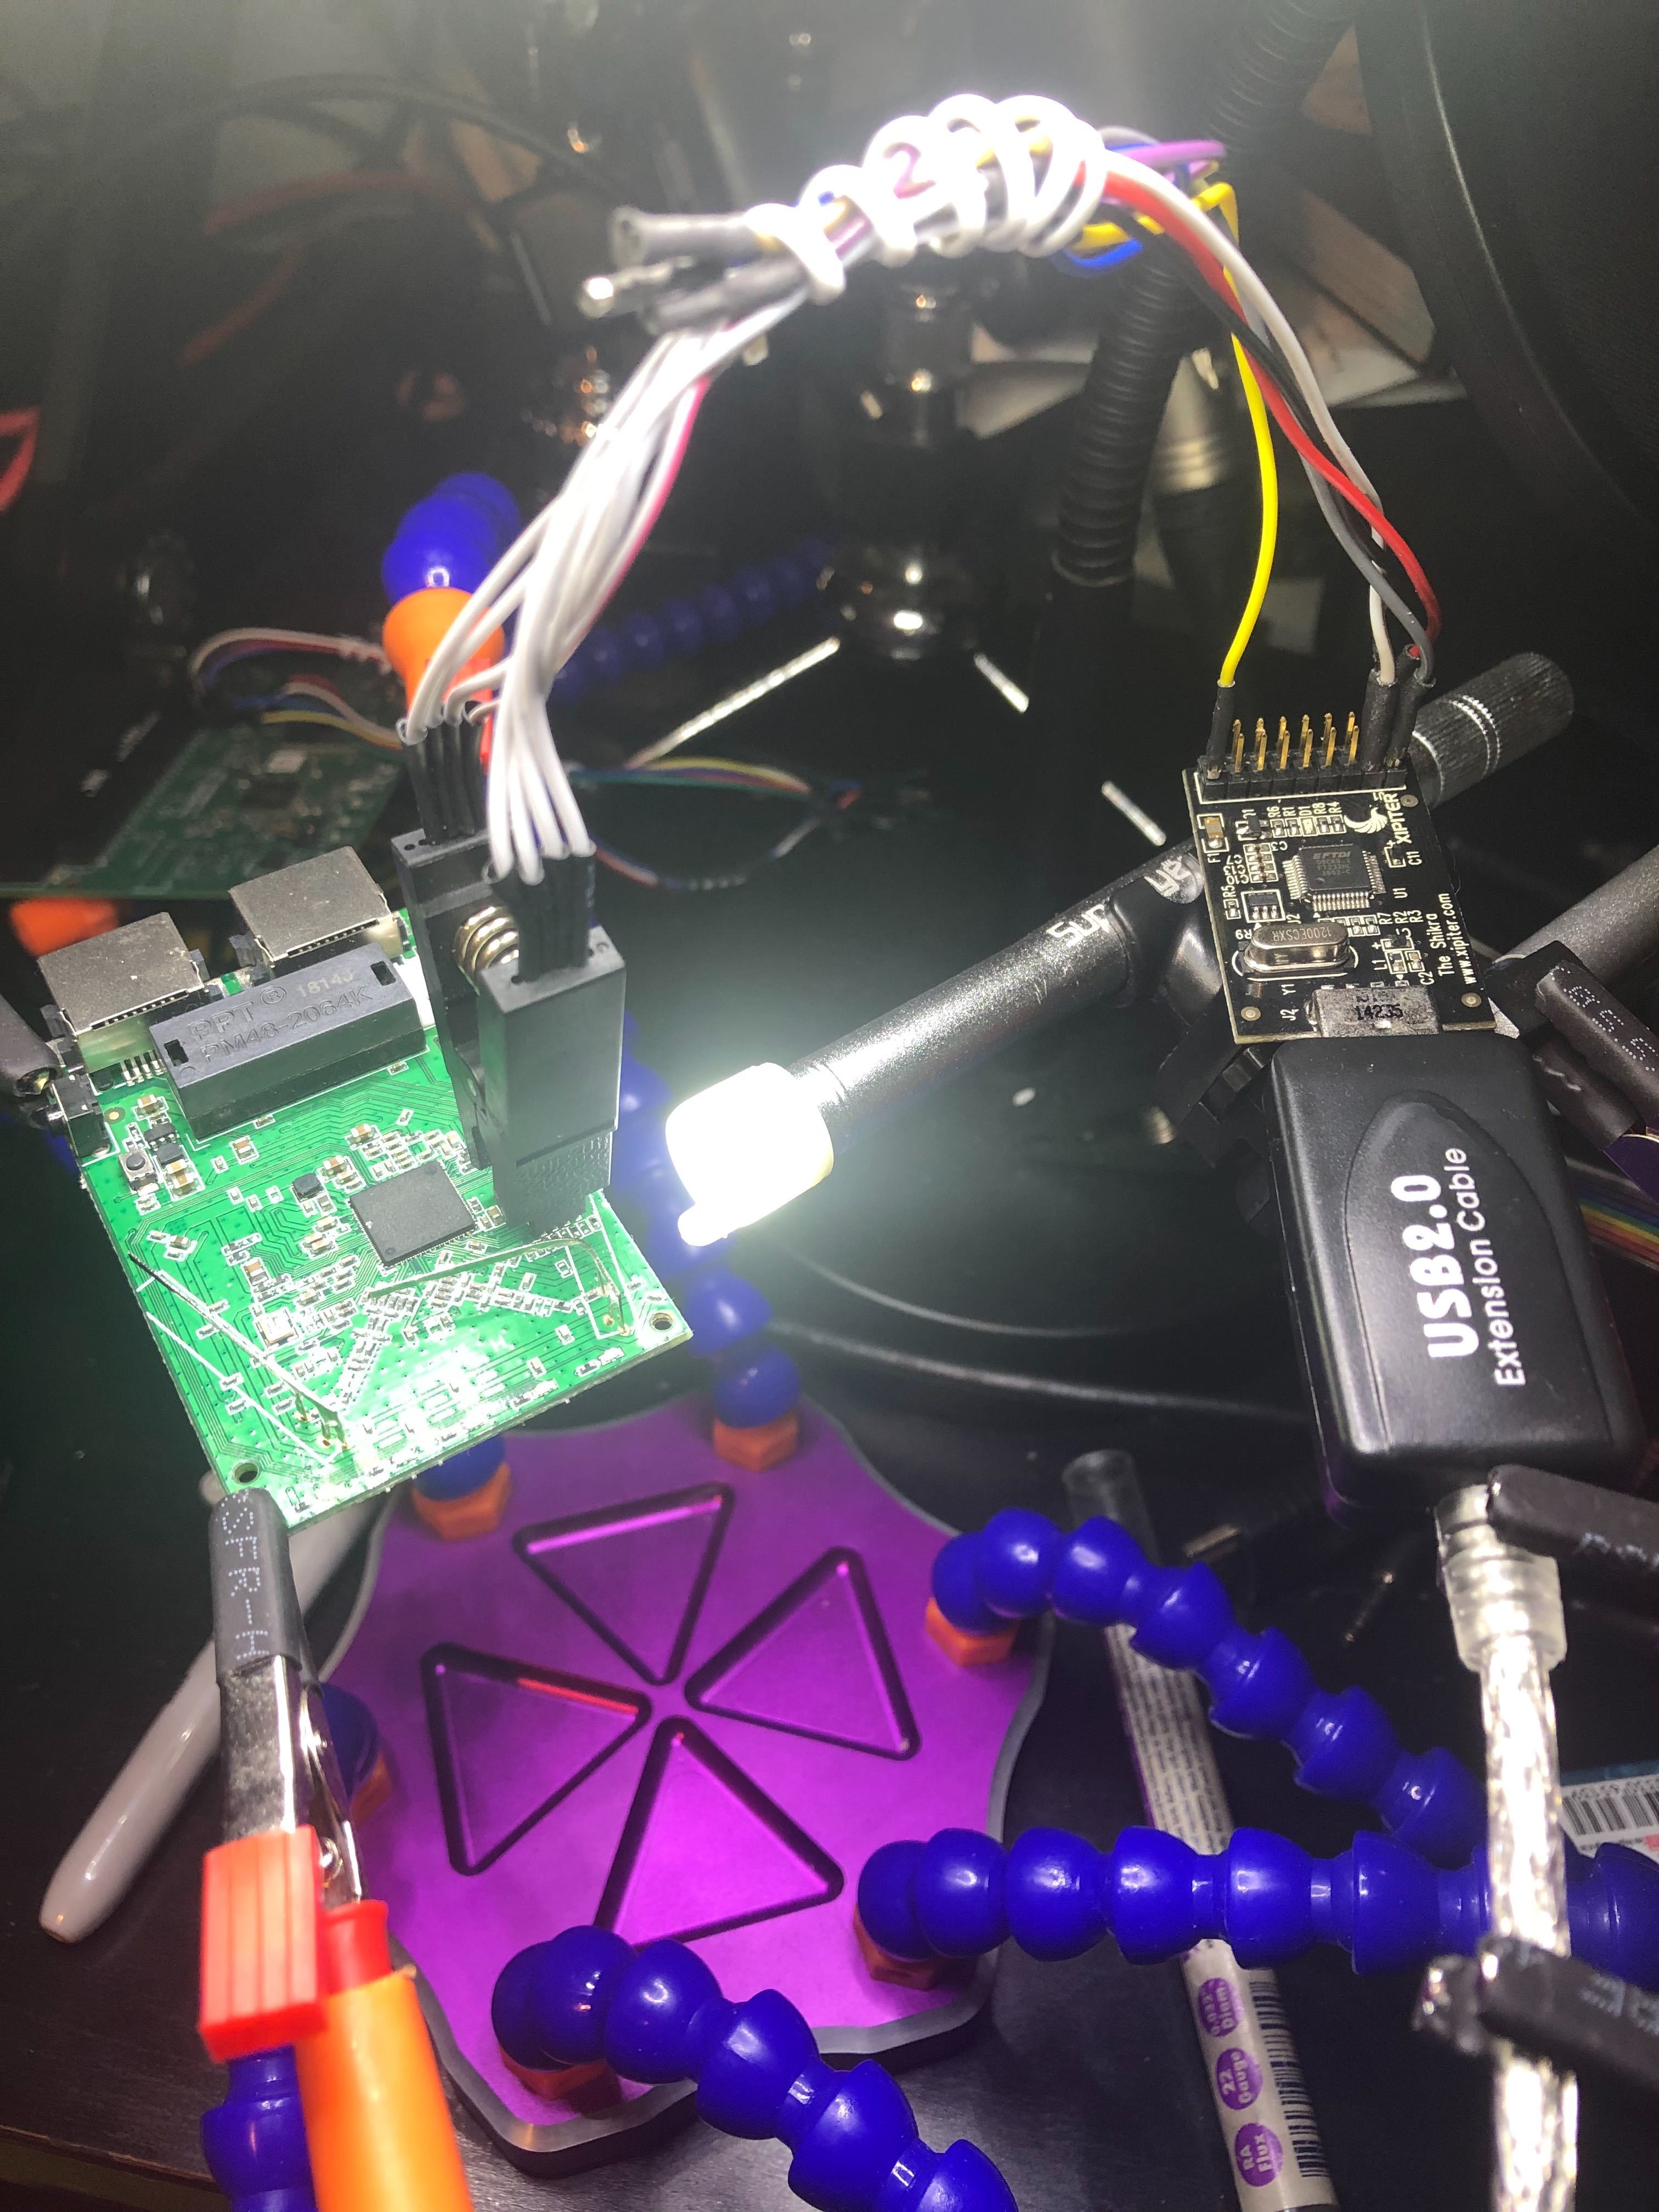
A fast and loose rule, when looking at the router mainboard, is that the big chip in the center is the processor, and the small chip at the side is anIn our case, we’re looking for the eeprom. The eeprom is used to store relatively small amounts of data, but allows individual bytes to be erased and reprogrammed. Hardware manufacturers can get clever by erasing the chip identifiers, covering them up in epoxy, or even both. Ours was just hard to read.
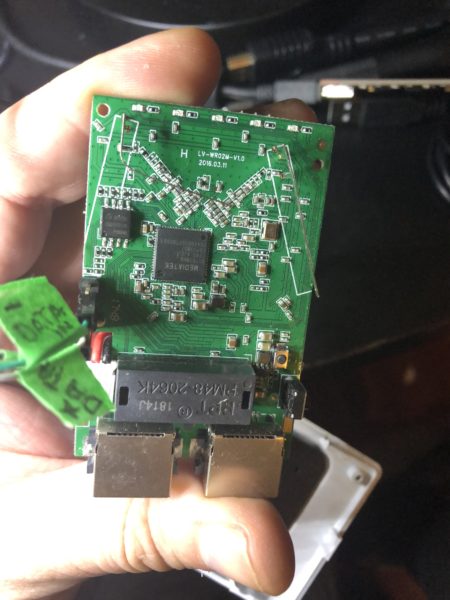
The eeprom on our target device is the smaller chip, with 8 “feet” as seen on the left of this picture.
Once we have dumped the firmware, we can also compare the latest firmware available on the website of manufacturer and the one we extracted. If we were hunting for vulnerabilities, it would actually be preferable for us to have an older firmware on our router. It gives us good hints as to what was changed in the new version. What did the patch address?
Investigating the eeprom
Rather than using the Chinese language only application that came with the SuperEyes microscope, I installed “Cheese” in Linux. Cheese can use any webcam detected, so I selected the USB 2.0 camera in the preferences and was able to use it in Ubuntu.
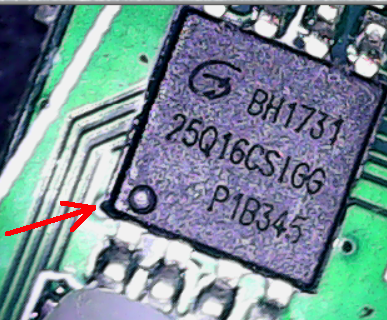
And here is where things get fuzzy. We have to map the pin out of the eeprom to the SOIC clip pins, and then from the SOIC clip to the BusPirate or the Shikra interface. We can Identify pin 1 by the dot on the chip, but we need to go online and try to find the data sheet for this chip to know how to connect it. I Googled several data sheets and wasn’t able to find an exact match.
At this point we could use an oscilloscope, but thats a little out of our budget, so we’re going to fudge it and use the pin from a similar eeprom chip and hope for the best.
Many of the searches I conducted indicated that this might be a Gigadevice chip. While there doesn’t seem to be a standard for which pins do what, most of the data sheets have diagrams such as this one:
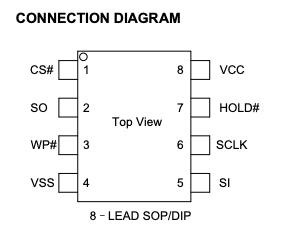
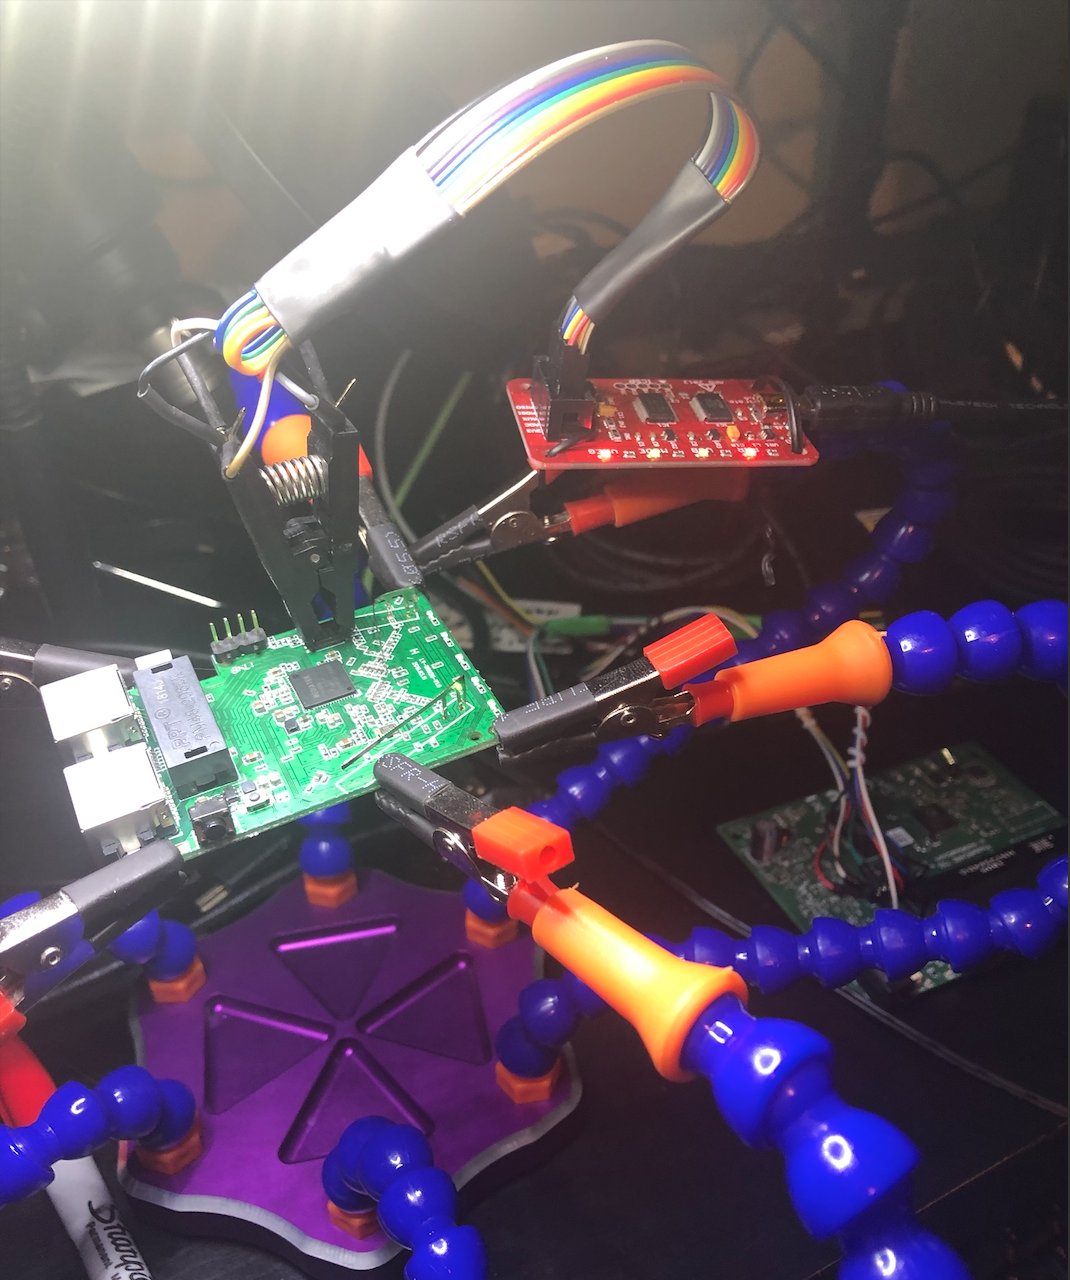
I connected the SOIC chip clip by grabbing the chip. Seen from directly above, it would look like this:

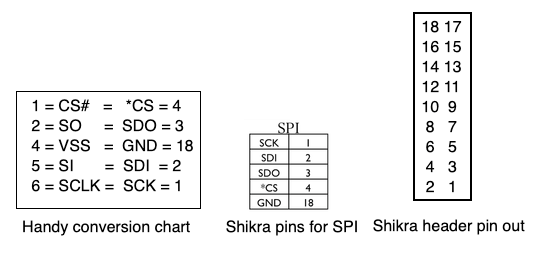
The protocol we will be using to read the eeprom is SPI, and the Shikra pin documentation has a chart for SPI. We need to map the pins from the eeprom to the Shikra to successfully dump the contents of the chip. I investigated each acronym from the chip, as well as each for the Shikra (for SPI) and made a chart to know which pins go from one to the other. The eeprom is on the left of the chart; the Shikra is on the right.
On our research Linux laptop, we can issue the command “$ dmesg | grep tty” to confirm the Shikra is properly detected and is located at ttyUSB0. This is what we should see as an output:

We will need an application called flashrom. A simple “$ sudo apt-get install flashrom” will do this for us. To dump the firmware, we issue this command to the Shikra “$ flashrom -p ft2232_spi:type=232H -r spidump.bin”

Flashrom identifies the chip as a GD21Q16(B) and, armed with this knowledge, Google searches yielded the exact data sheet. It feels like the long way around to get the proper data sheet in PDF form, but our gamble paid off. We now have a dump of the eeprom and we can continue our research. I reproduced the same steps as the ones I had done with the Shikra with the Bus Pirate and dumped the firmware with it as well. The Bus Pirate did take considerably longer to dump the firmware.
Flashrom did complain somewhat during the dumping process when I used the Bus Pirate, but it completed successfully.